Luxury Showroom LED Content Zoning Singapore 2026
Written and reviewed by the ETA Visual Engineering & Project Team. Guidance is updated when project, product or Singapore site-planning practices change.

For Singapore teams planning luxury showroom LED display content zoning Singapore, a successful result begins with the room rather than a catalogue. The intended audience, where people stand or sit, the material that will be shown and the way the display fits the interior should be resolved before comparing product proposals. In these settings, an indoor LED wall must work with the customer or presentation journey.
A good brief describes viewing positions, physical wall limits, content sources, service access, power and data coordination, and the acceptance checks required before handover. It also separates decisions that affect the visible result from decisions that simply increase a specification list. This guide explains the questions to ask, a practical comparison framework and the information a supplier needs to plan an indoor LED installation with fewer late changes.
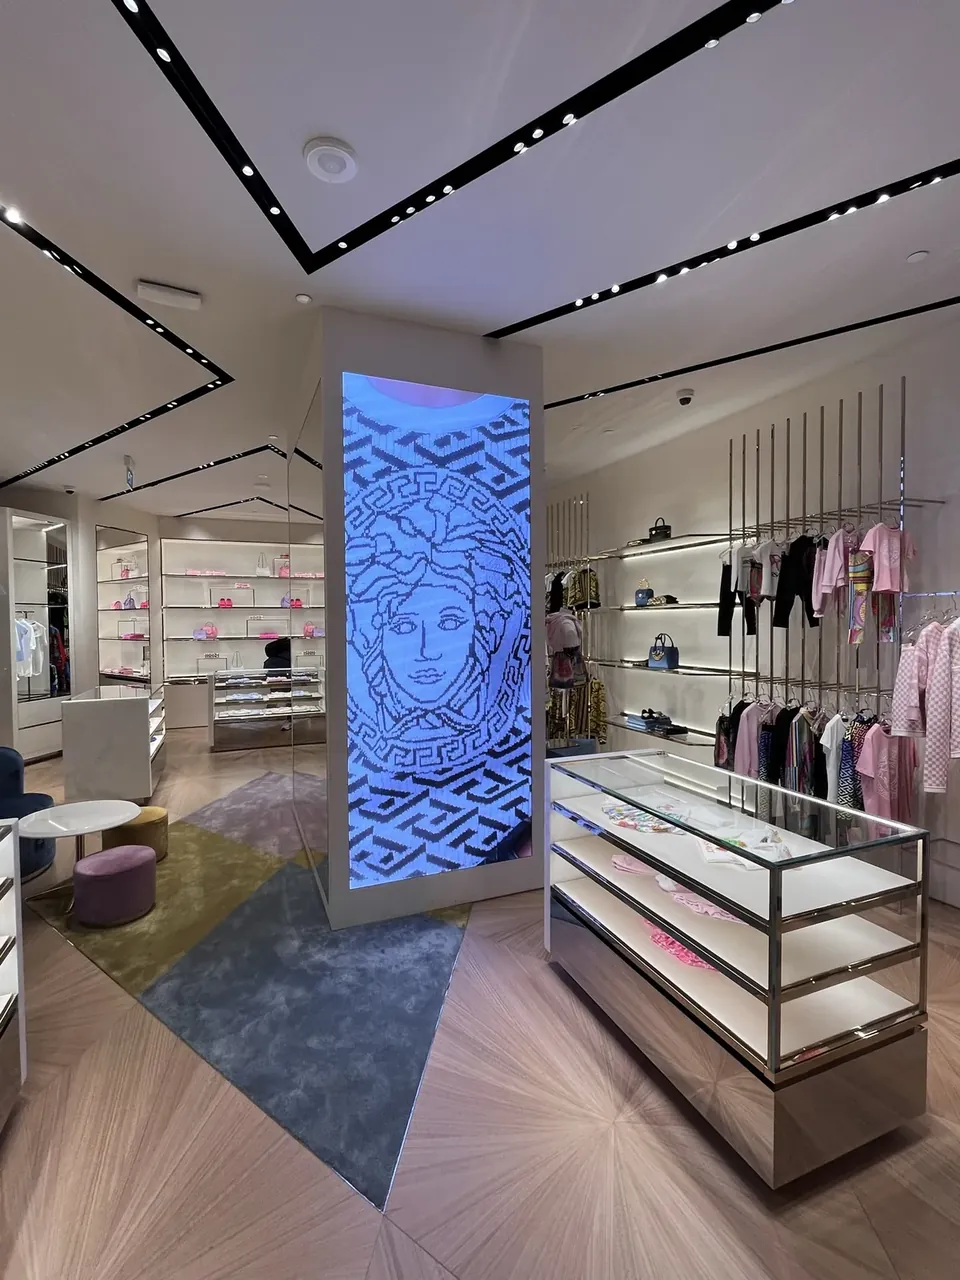
ETA Visual's Emporio Armani case page states that it completed a P1.86 indoor LED display installation at Marina Bay Sands Singapore with retail fit-out coordination. This factual example shows why the display, environment and project coordination need to be considered together. Use the following guidance to build an informed brief and compare proposals on criteria that match the intended use.
1. Site survey and viewing geometry
Understanding the physical context is the first step. Map the showroom floor, customer circulation paths, merchandising islands and fixed furniture. Measure typical and peak viewing distances and note sightlines from entry points, POS counters and seating. Zoning decisions are driven by where customers pause and what you want them to look at: product detail zones near displays need higher pixel density; ambient branding zones that set mood can use larger pixel pitches and lower content complexity.
Consider ceiling height and mounting depth limits — they affect viewing angles and the perceived sharpness. Lower placements increase perceived resolution for a given pixel pitch; high-mounted walls need more pixels to retain detail. Also document ambient lighting: strong daylight or accent lights change perceived luminance and may require higher maximum brightness or anti-glare treatments.
2. Pixel pitch, resolution and physical zoning choices
Choose pixel pitch and native resolution per zone. For product-focused zones where customers inspect materials or fine details, target pixel pitches in the P1.2–P1.8 range depending on average viewing distance (shorter distances -> smaller pitch). For ambient background zones, P2.5–P3.9 can be acceptable and often reduces cost. Balance pixel pitch against the total display size and the content you plan to run: a single continuous screen can be partitioned logically in software, but mixing pixel pitches on the same physical plane complicates hardware procurement and calibration.
In many luxury retail spaces a unified visual plane is desirable for aesthetic reasons. When that is the brief, use consistent cabinet modules and select a pixel pitch that meets the most demanding zone’s requirements, accepting higher cost to maintain seamlessness. Alternatively, distinct recessed panels allow physical differentiation and tailored pixel density per zone.
3. Content strategy and production pipeline
Define content roles: product detail, product-in-context, brand ambience, dynamic promotions and wayfinding. For each role, specify motion characteristics (static imagery, slow motion, cinematic 24–30 fps), colour gamut needs, and the expected maximum luminance. Product detail zones require high bitrate, sharp assets; ambience zones benefit from graded motion loops and subdued contrast to avoid visual fatigue.
Create a content style guide that includes palette, typography safe areas, logo usage, and transition rules between zones. Decide if content will be time-scheduled (e.g., different looks during day vs evening) or contextually driven (e.g., triggered by sensors or staff operation).
Asset management: centralise masters in a production repository and create zone-specific exports to avoid on-site transcoding delays. Name files with zone, aspect ratio and intended duration to simplify playback mapping during commissioning.
4. System integration and control workflows
Integration covers media servers, control systems, network architecture and on-site playback devices. Confirm compatibility between the selected LED controller and the chosen media server software. For multi-zone systems, ensure the media server supports region-of-interest mapping so different content streams can run concurrently with precise timing across zones.
Specify control interfaces: supplier systems commonly offer web dashboards, API access or third-party control integration. If the showroom uses an existing building management or lighting control system, plan early for protocol integration (e.g., REST, OSC, or vendor SDKs) to synchronise lighting and content states.
Redundancy and reliability: for critical brand-facing displays, request dual-path playback or hot-swap media servers and network switch redundancy to minimise downtime during busy retail hours.
5. Calibration, commissioning and operations
Calibration aligns colour, grayscale and brightness across zones so the entire visual plane looks coherent. Perform photometric measurements in situ using a colourimeter or spectroradiometer and apply per-module calibration profiles. Address edge-blending or seam correction if panels are tiled to maintain continuity between zones.
Commissioning must include content playback tests across all scheduled modes, latency checks when switching content or when triggered by external systems, and stress tests for prolonged loops at maximum brightness. Obtain calibration reports and playback logs as part of handover documentation.
Plan for training sessions for showroom staff focused on content scheduling, basic troubleshooting and safe shutdown/startup procedures. Clear operation guides reduce the need for supplier returns for routine questions.
6. Logistics, installation and delivery planning
Logistics and delivery can be a critical path item. Provide suppliers with floor plans, mounting details, service access points and on-site power capacities early. If the LED surface is integrated into bespoke joinery, coordinate cabinet tolerances, fixing points and ventilation to avoid heat build-up behind the display.
Schedule delivery and installation to minimise disruption, often outside trading hours. Allow time on-site for firmware updates, cabling adjustments and final alignment. Include contingency time for content iteration after an initial on-site review; real-world viewing often reveals composition and brightness tweaks that studio proofs do not.
Procurement tip: request itemised proposals separating hardware, installation, software licensing and content services. This keeps future upgrades and content updates fiscally transparent and easier to manage.
7. Acceptance criteria and future-proofing
Testing options and a clear acceptance process protect both buyer and supplier. Define acceptance criteria including pixel integrity limits, uniformity tolerances, maximum allowed dead pixels, colour matching tolerances and control interface functionality. Run a joint acceptance test with measured light readings and playback of representative content across all zones.
Future-proofing: ensure the system supports firmware upgrades and that spare parts (cabinets, power supplies, data distribution units) are identifiable and available. Ask suppliers about upgrade paths for higher pixel density modules if you anticipate evolving content requirements.
Finally, consider accessibility and compliance with local regulations for electrical installations, fire safety clearances and signage rules applicable in Singapore retail buildings.
| Zone type | Typical viewing distance | Recommended pixel pitch | Content characteristics | Integration considerations |
|---|---|---|---|---|
| Product detail / focal wall | 1–3 m | P1.2–P1.8 | High-resolution stills, macro video, sharp typography | High-bandwidth media server, strict calibration |
| Product-in-context / lifestyle | 3–6 m | P1.8–P2.5 | Cinematic motion, branded lifestyle loops | Schedule-driven playback, moderate bandwidth |
| Ambient branding / backdrop | 6+ m | P2.5–P3.9 | Soft motion loops, colour atmospheres, low contrast | Lower bandwidth, can be linked to ambience lighting |
| Interactive / kiosk-adjacent | 0.5–2 m | P0.9–P1.5 (if touch or proximity needed) | High-detail UI, responsive transitions | Low-latency input handling and dedicated control paths |
Want an accurate budget for your space?
We'll do a free site survey and prepare a clear, itemised quotation — no obligation.
Frequently asked questions
Start with the showroom layout, sightlines, and typical viewing distances. Define primary use cases (product focus, ambience, dynamic branding) and map zones to fixtures and customer pathways. Develop a content brief with file formats, aspect ratios, brightness targets, and scheduling rules so suppliers can price and specify hardware and control systems accurately.
Yes. Content zoning lets you optimise resolution and visual hierarchy: high-detail product zones use denser pixel pitches, while distant ambience zones can use larger pitches. Zoning also supports different brightness levels and schedules to reduce power use and extend display life when full output is not needed.
Use 8–12 bit per channel content where possible, provide source files in lossless or high-quality compressed formats (e.g., ProRes, HEVC for delivery), and supply assets at native pixel mappings for each zone. Include master assets plus variants for differing aspect ratios and letterboxed crops, and provide clear instructions for scaling and safe area margins.
Coordinate early with lighting and interior designers to reduce glare and reflections. Choose non-reflective finishes near the LED, use controlled accent lighting rather than broad washes, and plan sightline masking or folding walls to create comfortable viewing angles.
Allow time for content adaptation, calibration and system commissioning. Expect a phased delivery: concept and technical brief, supplier proposals, prototype content review on-site, installation, calibration and joint acceptance tests. Build at least 6–12 weeks into schedules for high-detail content and multi-zone system integration.
Plan the next step
Continue with a relevant solution and real Singapore project evidence.